
Power Automate Retry and Timeout Policies: The Complete Guide for Beginners
Ever had a Power Automate flow fail because a service was temporarily down? Or waited forever for an action that just wouldn’t complete? That’s where Retry and Timeout policies come to the rescue!
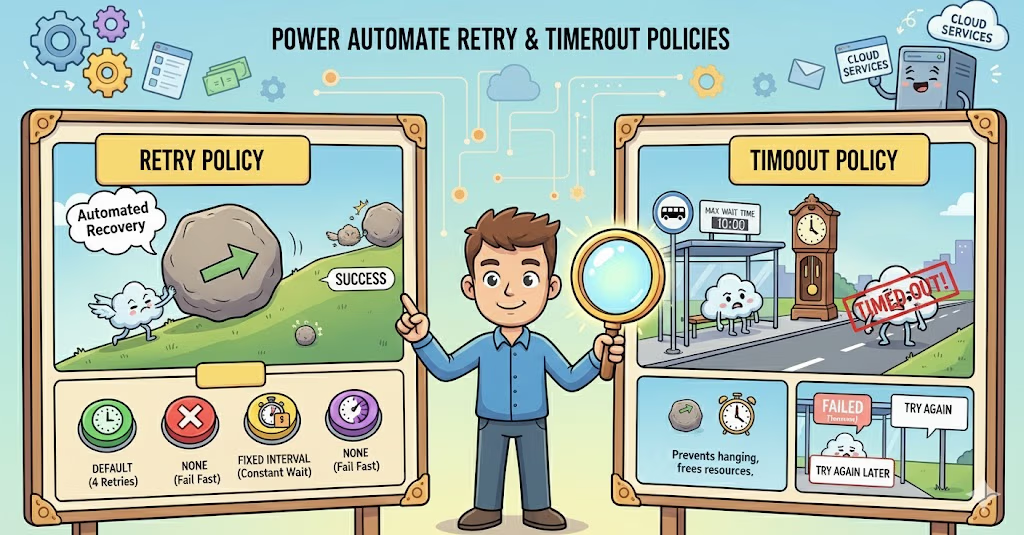
Think of these policies as your flow’s safety net—they help your automation handle hiccups gracefully instead of crashing completely. Let me break this down in the simplest way possible.
What Are Retry and Timeout Policies?
Imagine you’re calling a friend, but their phone is busy. What do you do?
- Retry Policy: You call them again after a few minutes (and maybe a few more times)
- Timeout Policy: You decide that if they don’t pick up within 5 minutes, you’ll stop trying
Power Automate works the same way with APIs and services!
Understanding Retry Policy, What Does It Do?
When an action fails (due to network issues, temporary service outages, or rate limits), the Retry Policy automatically tries the action again instead of immediately failing your entire flow.
The Four Retry Types
1. None
What it means: Don’t retry at all. If it fails, it fails.
When to use: For actions that shouldn’t be repeated (like sending a one-time notification)
Example: Sending a congratulatory email for a contest winner
2. Default
What it means: Power Automate decides the retry strategy
Retry attempts: 4 times
Interval pattern: Exponential (wait time increases: 5s, 10s, 20s, 40s)
When to use: Most everyday scenarios
Example: Fetching data from SharePoint or sending Teams messages
3. Fixed Interval
What it means: Retry at regular, fixed time intervals
Example: Retry every 30 seconds, consistently
When to use: When you need predictable retry timing
Example: Checking if a file has been uploaded to a specific folder
4. Exponential Interval
What it means: Wait time doubles with each retry
Example: Wait 10s, then 20s, then 40s, then 80s
When to use: When dealing with rate-limited APIs or overloaded services
Example: Calling external APIs with rate limits (like Twitter, LinkedIn APIs)
Understanding Timeout Policy, What Does It Do?
Timeout determines how long Power Automate will wait for an action to complete before giving up.
Key Settings
Default timeout: Usually 2 minutes
Maximum timeout: Can go up to 30 days (for certain actions)
ISO 8601 format: Duration is set using format like
PT1M(1 minute) orPT2H(2 hours)
When to Adjust Timeout
Short timeouts (30 seconds – 2 minutes): Quick API calls, simple database queries
Medium timeouts (5-10 minutes): File processing, report generation
Long timeouts (30+ minutes): Data migrations, batch processing, video encoding
How to Configure Retry and Timeout Policies: Step-by-Step
Step 1: Open Your Flow
Go to Power Automate
Open the flow you want to configure
Click on the action you want to modify
Step 2: Access Settings
Click the three dots (…) in the top-right corner of the action
Select Settings
Step 3: Configure Retry Policy
You’ll see the Retry Policy section with these options:
For Default Retry:
Simply leave it as “Default” (no configuration needed)
For Fixed Interval:
Change “Type” to Fixed
Set Count: Number of retry attempts (e.g., 3)
Set Interval: Time between retries in ISO 8601 format
PT10S= 10 secondsPT1M= 1 minutePT5M= 5 minutes
For Exponential Interval:
Change “Type” to Exponential
Set Count: Number of retry attempts (e.g., 4)
Set Interval: Initial wait time (e.g.,
PT10Sfor 10 seconds)Set Maximum Interval: Cap on wait time (e.g.,
PT1Hfor 1 hour)Set Minimum Interval: Minimum wait time (optional)
Step 4: Configure Timeout
In the same Settings menu:
Find the Timeout field
Enter duration in ISO 8601 format
PT30S= 30 secondsPT5M= 5 minutesPT1H= 1 hour
Step 5: Save
Click Done to save your settings
Example 1: Sending Email with Office 365
Scenario: Sending daily report emails
Configuration:
Retry: Default (4 attempts with exponential backoff)
Timeout: PT2M (2 minutes)
Why: Email services are usually reliable, but occasional hiccups happen. Default retry handles temporary issues without overwhelming the service.
Example 2: Calling Third-Party API (Weather Service)
Scenario: Fetching weather data from an external API with rate limits
Configuration:
Retry Type: Exponential
Count: 5
Interval: PT30S (start with 30 seconds)
Maximum Interval: PT10M (max 10 minutes between retries)
Timeout: PT5M (5 minutes per attempt)
Why: APIs often have rate limits. Exponential backoff prevents hammering the service and respects rate limits.
Example 3: Processing Large Excel File
Scenario: Reading and parsing a 50MB Excel file from SharePoint
Configuration:
Retry Type: Fixed
Count: 2
Interval: PT1M (1 minute between retries)
Timeout: PT15M (15 minutes)
Why: Large files take time to process. A longer timeout prevents premature failure, while limited retries prevent infinite loops.
Example 4: Creating SharePoint List Item
Scenario: Adding new customer data to SharePoint list
Configuration:
Retry: Default
Timeout: PT1M (1 minute)
Why: SharePoint operations are usually fast. Default settings work well for standard CRUD operations.
Example 5: HTTP Request to Unreliable Service
Scenario: Calling an internal legacy system known for occasional slowness
Configuration:
Retry Type: Exponential
Count: 6
Interval: PT20S (20 seconds)
Maximum Interval: PT5M (5 minutes)
Timeout: PT10M (10 minutes)
Why: Legacy systems need patience. More retries with exponential backoff plus longer timeout increases success rate.
ISO 8601 Duration Format Cheat Sheet
Here’s a quick reference for setting durations:
PT10S= 10 secondsPT30S= 30 secondsPT1M= 1 minutePT5M= 5 minutesPT30M= 30 minutesPT1H= 1 hourPT2H= 2 hoursPT1D= 1 dayP7D= 7 days
Format breakdown:
P= Period (required)T= Time separator (required for hours/minutes/seconds)Numbers followed by
D(days),H(hours),M(minutes),S(seconds)
Best Practices
Do’s ✅
Use Default for most actions: It’s optimized for common scenarios
Use Exponential for rate-limited APIs: Respects service limits
Increase timeout for heavy operations: File processing, data migrations
Test your configurations: Run flows with different scenarios
Monitor flow runs: Check which actions fail and adjust accordingly
Don’ts ❌
Don’t set infinite retries: Your flow could run forever
Don’t use short timeouts for slow operations: You’ll get false failures
Don’t retry critical one-time actions: Like payment processing
Don’t ignore error handling: Combine retry/timeout with proper error handling
Don’t use same settings everywhere: Different actions need different strategies
Common Mistakes to Avoid
Mistake 1: Using None Retry for Unstable Services
Problem: Flow fails on first temporary glitch Solution: Use at least Default retry for external services
Mistake 2: Too Many Retries
Problem: Flow takes forever to fail when something is genuinely broken Solution: Limit retries to 4-6 attempts maximum
Mistake 3: Short Timeouts for Long Operations
Problem: Flow fails even though operation would succeed with more time Solution: Analyze how long operations typically take and add buffer
Mistake 4: Fixed Interval for Rate-Limited APIs
Problem: You keep hitting rate limits Solution: Use Exponential interval to space out requests
Troubleshooting Tips
Flow Keeps Failing?
Check if timeout is sufficient for the operation
Increase retry count
Check service health (is the API actually down?)
Flow Takes Too Long?
Reduce timeout for fast-failing actions
Reduce retry count if service issues are rare
Getting Rate Limited?
Switch to Exponential interval
Increase initial interval
Reduce retry count
Conclusion
Retry and Timeout policies are powerful tools that make your Power Automate flows more resilient and reliable. Start with Default settings, monitor your flows, and adjust based on real-world performance.
Remember:
Retry = How many times to try again
Timeout = How long to wait before giving up
Exponential = Best for rate-limited services
Fixed = Best for predictable timing needs
With these policies properly configured, your flows will handle temporary issues gracefully and succeed more often. Happy automating!