Migrate data from Excel to SharePoint

A cartoon-style illustration showing the process of importing data from an Excel spreadsheet into a SharePoint list. The image features an Excel file icon on the left, a SharePoint list icon on the right, and arrows indicating the data flow between them. The arrows highlight key steps in the process, making the concept visually clear.

Migrate data from Excel to SharePoint

Step 1: Prepare Your Data

  • First thing you need is Excel file ready
  • Ensure your data is formatted as a table in Excel.
  • Remove unnecessary columns and ensure headers are correctly labeled.

Note:

For the Demo purpose, I will be using tbl_Product_5000 Excel, you can download and practice along side.

Step 2: Go to SharePoint Online

  • Navigate to your SharePoint site where you want to create the list.
  • Navigate to Site Content
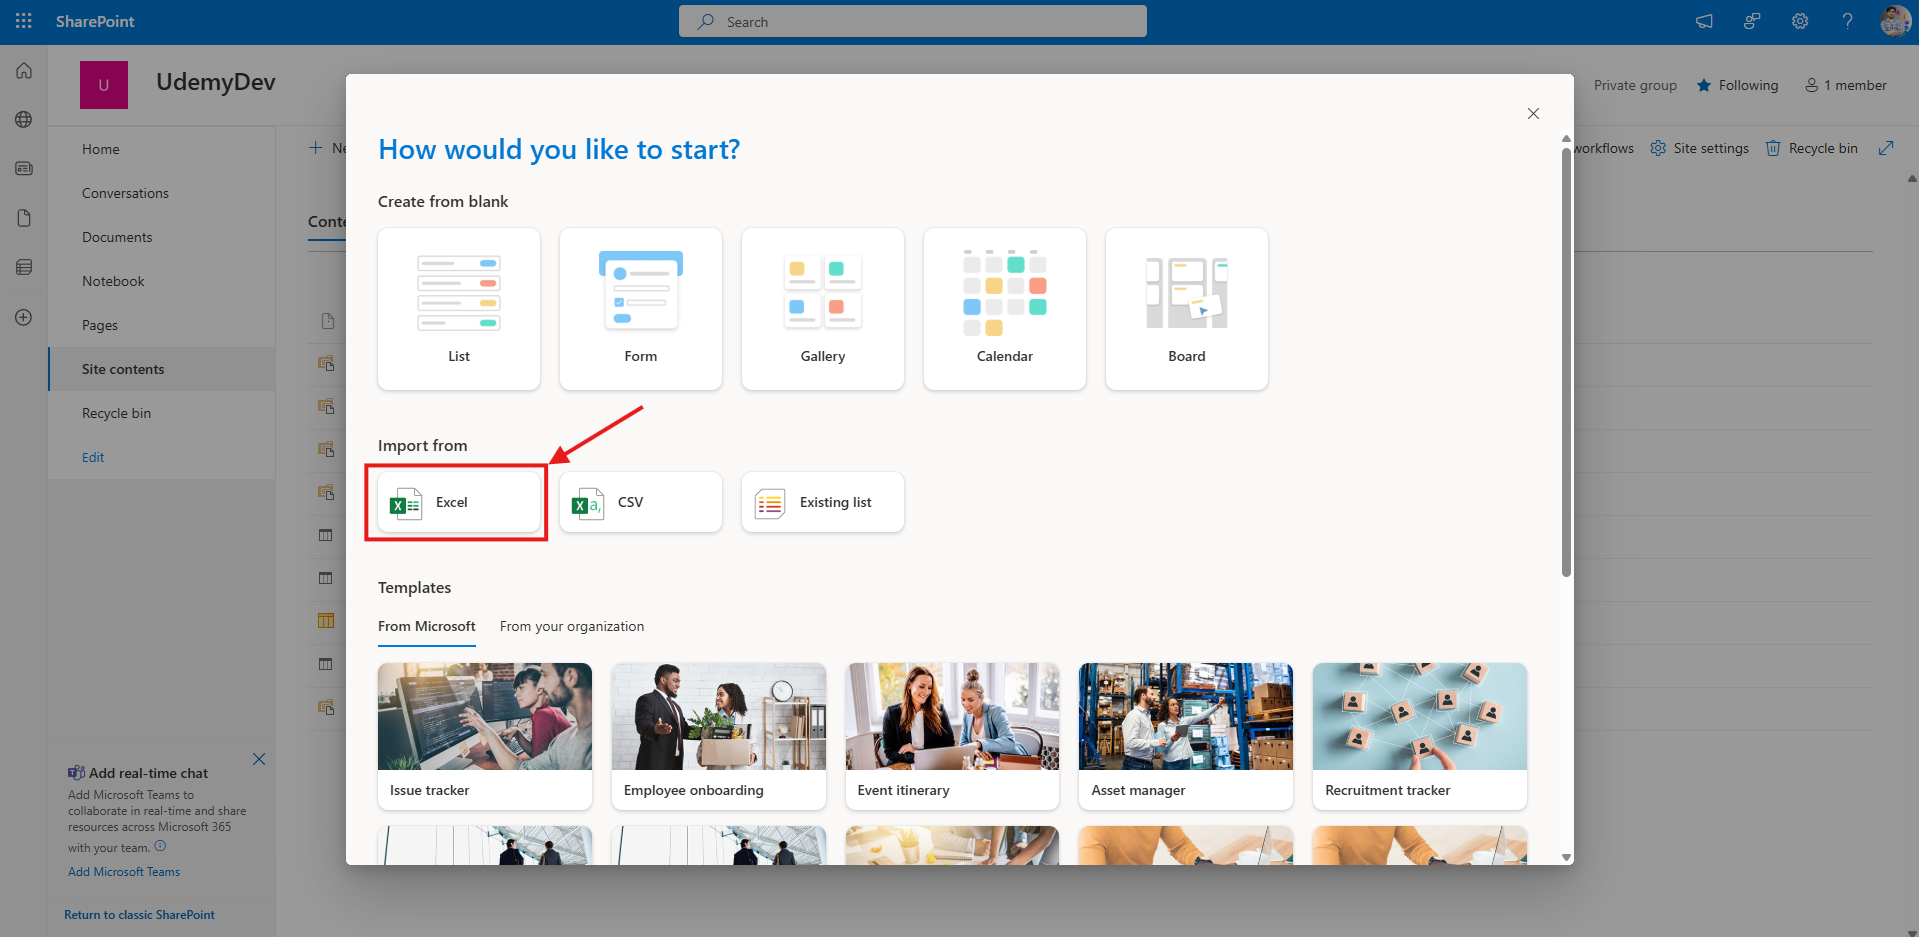
  • Click on New → List and select Import From: Excel.


Note:

For the Demo purpose, I will be using tbl_Product_5000 Excel, you can download and practice along side.

Step 3: Upload the Excel File

  • Select the Excel file you prepared earlier.

  • Note: The data in Excel table should not Exceed 5000 records.

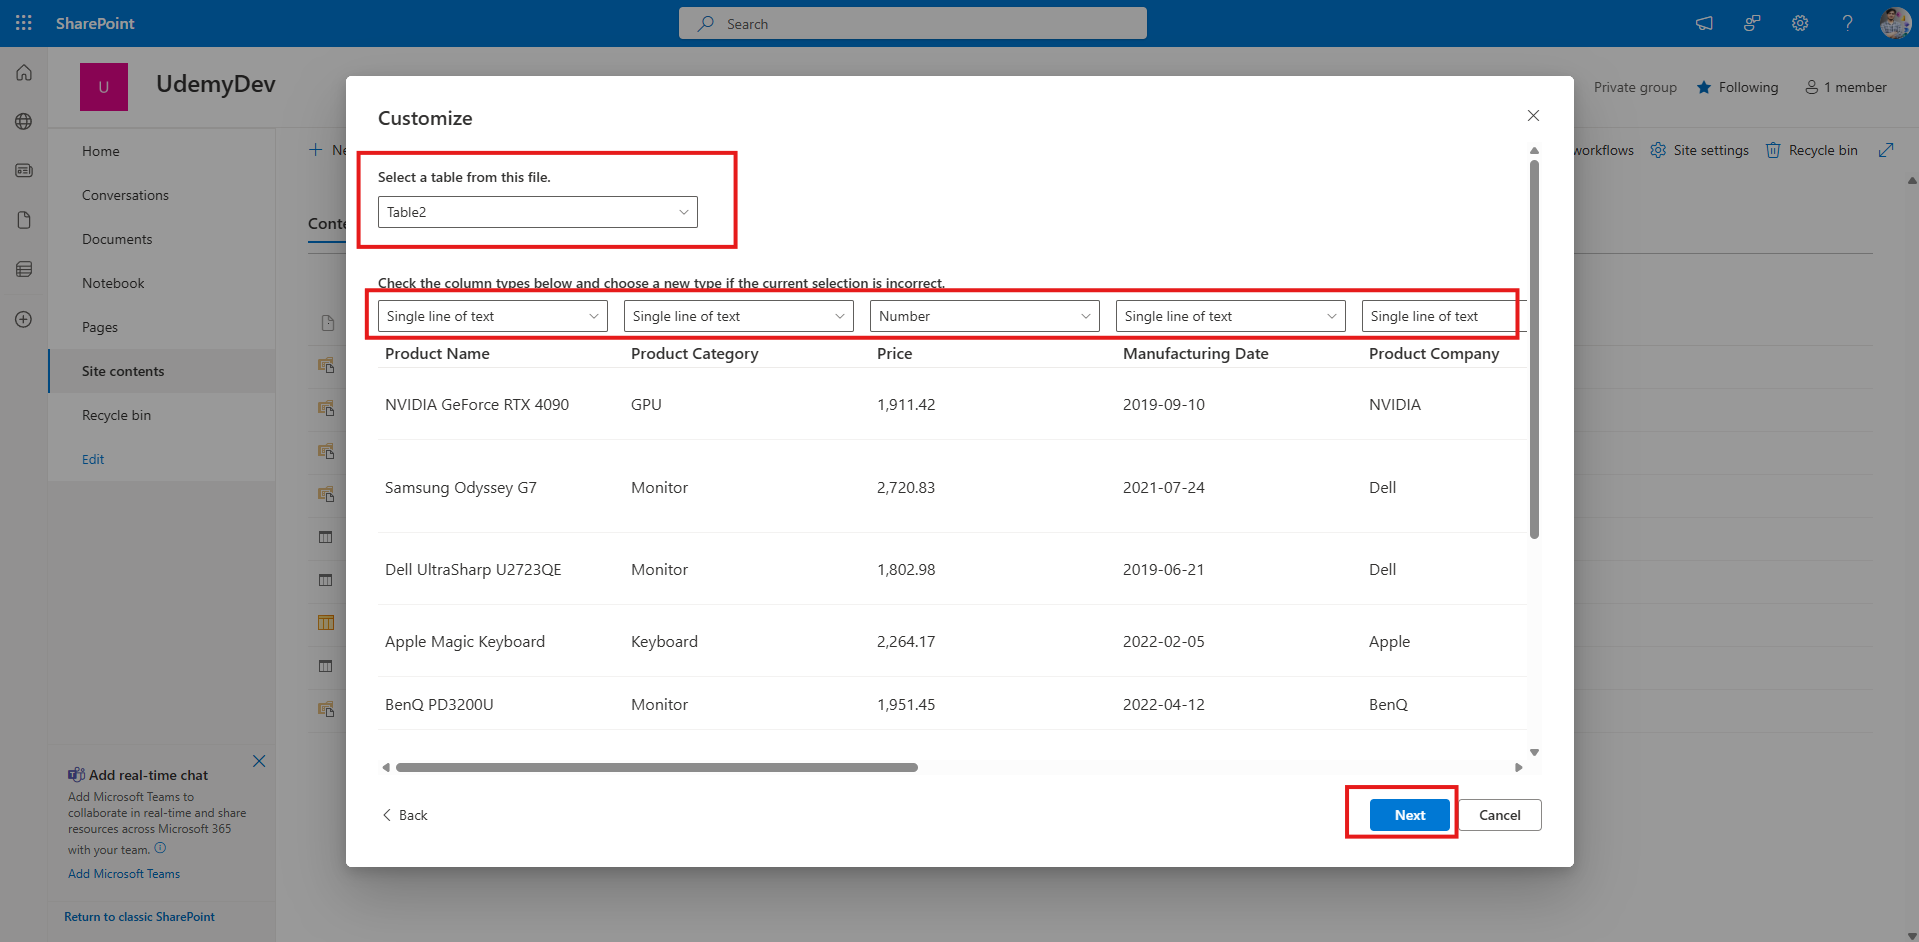
  • SharePoint will analyze the file and display available columns.


Step 4: Map Columns & Create the List

  • If Excel has one more than 1 Table, select the appropriate table (In my case it is Table2)
  • Ensure each column is correctly mapped to the appropriate data type (Single Line Text, Multi Line Text, Number, Choice, etc.).
  • Click on Next


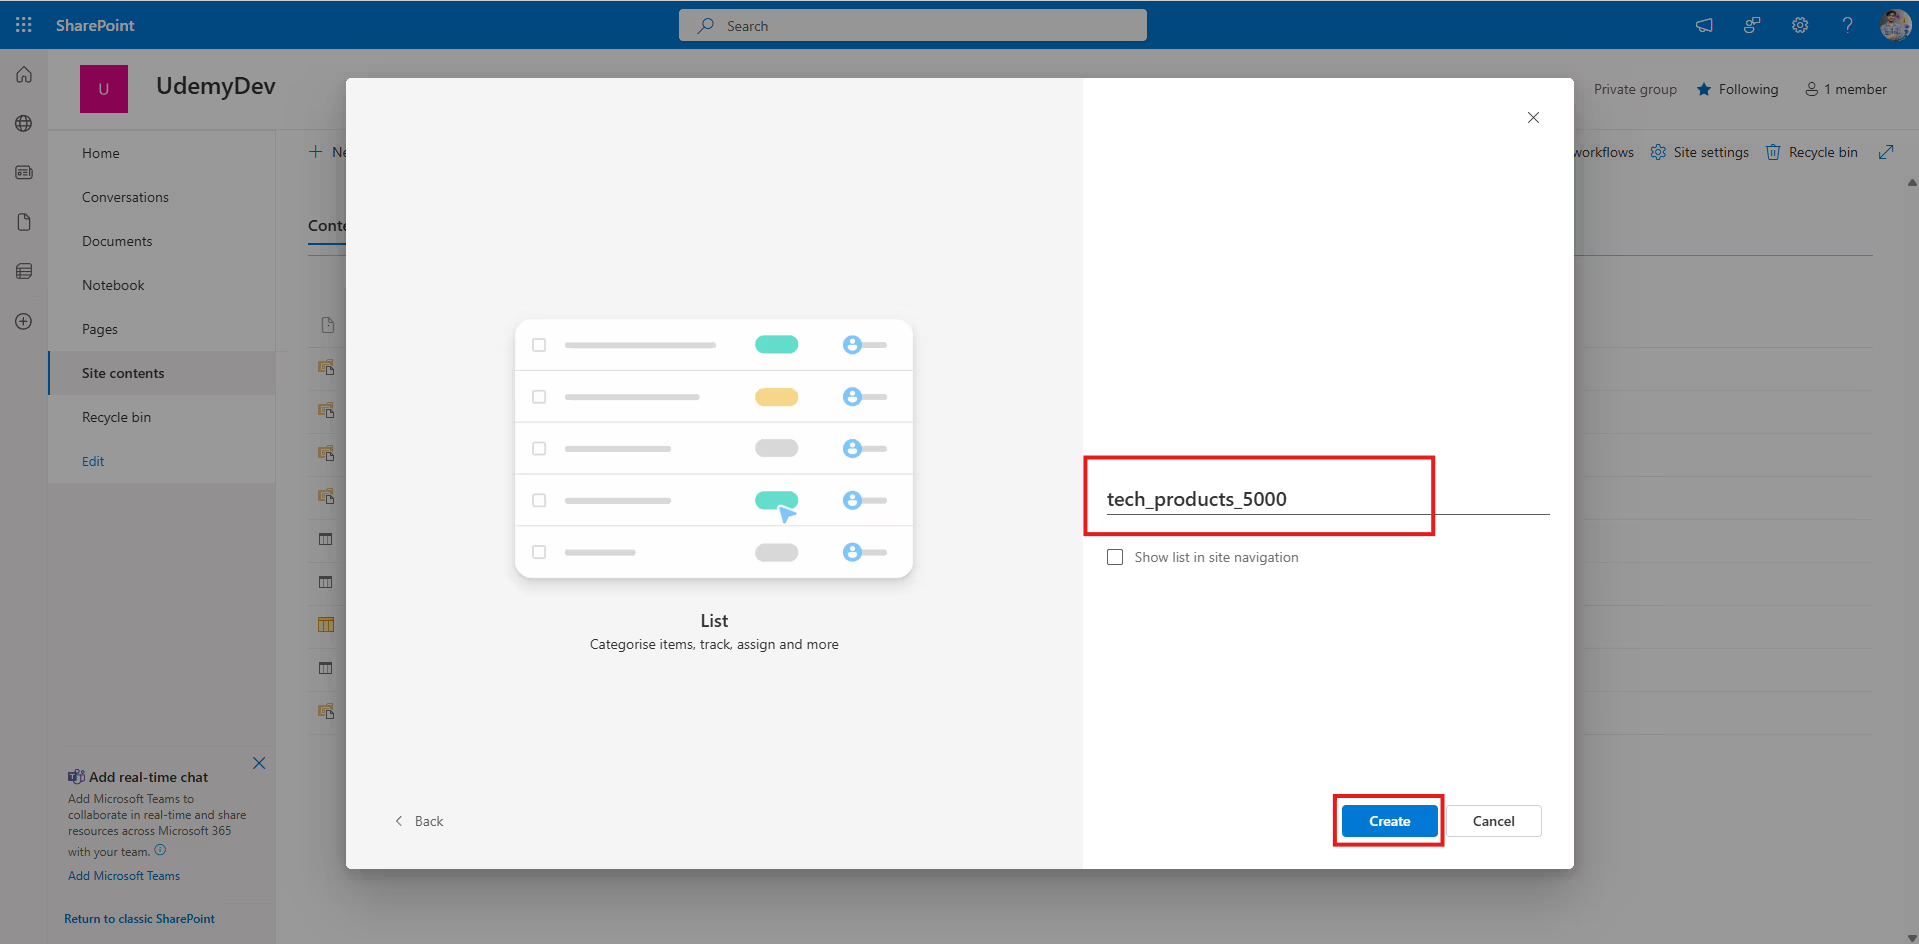
  • Give the List name to the List and click Create to finalize the list.


Process Completed, your data will get migrate in some time.


Are there any other methods to Migrate Data from Excel to SharePoint List?

Yes, there are 2 more ways
 
Copy-Paste Data into a SharePoint List


  1. Create a New SharePoint List

    • Go to your SharePoint site and create a blank list with matching column names.

  2. Open the List in Grid View

    • Click Edit in Grid View to enable bulk editing.

  3. Copy & Paste Data from Excel

    • Select your Excel data, copy it (Ctrl + C), and paste it into the SharePoint list (Ctrl + V).

    • Ensure the data aligns correctly with the columns.

  4. Save & Exit Grid View

    • Click Exit Grid View to finalize the import.

Using Power Automate for Automated Import


  1. Create a Power Automate Flow

    • Open Power Automate and create a new flow.

    • Use the “When a file is created in OneDrive” trigger (or manually select an Excel file).

  2. Extract Data from Excel

    • Use the “List rows present in a table” action to read Excel data.

  3. Insert Data into SharePoint List

    • Use the “Create item” action to add each row to the SharePoint list.

    • Map Excel columns to SharePoint fields.

  4. Test & Run the Flow

    • Save and test the flow to ensure data imports correctly.

Subscribe
Notify of
1 Comment
Oldest
Newest Most Voted
Inline Feedbacks
View all comments
trackback

[…] Confused how to import data from Excel to SharePoint? – Click here […]

SUBSCRIBE to get amazing offers on Last Minute Coders courses. Get premium content shared to your INBOX for FREE.

Join 4 other subscribers
This field is required.
Scroll to Top
1
0
Would love your thoughts, please comment.x
()
x